Hi Everyone, I am so excited to share my completed final challenge Feminine Gift Card Set for the AECP Level 1. It really stretched my knowledge and creativity, but I am enjoying the creative AECP journey and learning along the way.


I have been challenged to create one set of Masculine Cards and one set of Feminine Cards using at least three techniques I learned from the AECP Level 1 Courses.
Herewith my 4 Feminine Cards:

I am also asked to design how I package the masculine and feminine sets as a gift and also use a recycled item. I decided to use the recycled items on the packaging for each card set and I will explain how I did this in the latter part of my post and video.


The AECP Level 1 Techniques I used:
1. Easy Die Cutting Techniques
From this class I learned to connect other techniques to what I already knew about die cutting and take it to another level to achieve texture.
2. Celebration Stencil Techniques
This class was so helpful by learning how to use the Altenew Simple Shapes Cover Die with different stencil techniques to create backgrounds.
3. Easy Ink Blending Techniques
The class provided a framework how to achieve great ink blending results for my project backgrounds.
To achieve a cohesive theme I used all the above techniques in various ways to create 4 Feminine Cards, concentrating on the following colour inspiration and using the Altenew Delicate Garden Sentiment Stamp & Die Set and Simple Shapes Cover Die through out the set.

Card 1 - Happy Birthday
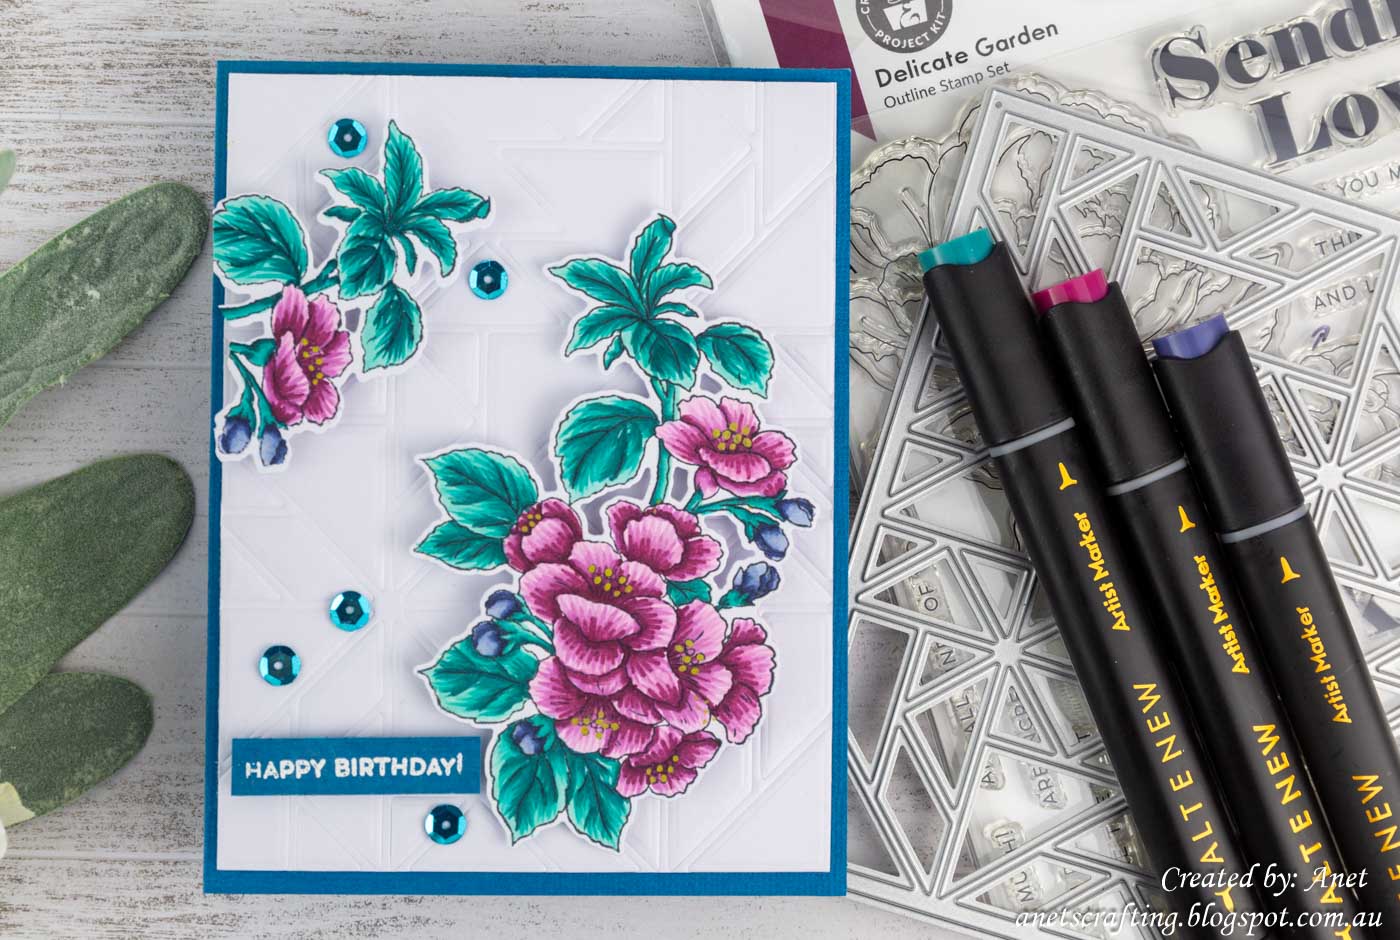
First I embossed white cardstock with the Altenew Simple Shapes Cover Die. I just love the beautiful textured background I achieved with the cover die.
Tip: Just remember to use an embossing mat and the special sandwich for your die-cut machine in order to get the perfect embossing with the cover die.

Following on from this I stamped the Altenew Delicate Garden Flower Stamp onto blending cardstock and colour it with the Altenew Artist Markers Mystic Garden Set J and Artist Markers Rock Garden Set D. I die-cut it with the Altenew Delicate Garden Flower Die and adhered it onto the card front using 3D foam dots.

To finish I stamped the Altenew Delicate Garden Sentiment Stamp, heat emboss it and layered it onto the card base using foam tape. I added some sequins.
Card 2 - Hello

First I ink blending the background with the Altenew Woodland Escape Fresh Dye Inks and added splatters with the Altenew Woodland Escape Redwood Fresh Dye Ink. I adhered it onto the card base using foam tape.

Following on from this I die-cut white cardstock with the Altenew Simple Shapes Cover Die and adhered it onto the ink blended background.

I then stamped the Altenew Delicate Garden Flower Stamp onto the vellum, heat emboss it and coloured the flower image with the Altenew Woodland Escape Redwood, Blue Mountains Indigo Skies and Frosted Foliage Forest Fern Fresh Dye Ink. I die-cut it with the Altenew Delicate Garden Flower Die and adhered it onto the card front using 3D foam dots.
Tip: Always use a powder tool to prepare your paper before heat embossing. The powder will prevent embossing powder from sticking to areas where you do not want it.

To finish I stamped the Altenew Delicate Garden Sentiment Stamp onto cardstock and heat emboss it. I adhered it onto the card front using 3D foam dots and added some sequins.
Card 3 - Thank You

First I mixed Altenew Blue Mountain Alphine Aster Fresh Dye Ink with Embossing Paste and used it through the Altenew Simple Shapes Cover Die stencil die-cut. Just love the beautiful texture I achieved for the background.
Tip: Just remember to clean your stencils and tools right away after you used Embossing Paste. Do not allow it to dry, because it will be very difficult to clean.

Following on from this I added splatters onto the textured background using the Altenew Blue Mountain Indigo Skies Fresh Dye Ink.

I then stamped the Altenew Delicate Garden Flower Stamp onto blending cardstock and colour it with the Altenew Artist Markers Mystic Garden Set J and Artist Markers Rock Garden Set D. I die-cut it with the Altenew Delicate Garden Flower Die and adhered it onto the card front using 3D foam dots.
Tip: When colouring with Alcohol Ink Markers it is important to use blending cardstock to prevent bleeding.

To finish I stamped the Altenew Delicate Garden Sentiment Stamp, heat emboss it and layered it onto the card base using foam tape. I added some sequins.
Card 4 - Happy

First I ink blending the background with the Altenew Woodland Escape Pink Sand Fresh Dye Ink and added splatters with the Altenew Blue Mountain Indigo Skies Fresh Dye Ink. I layered it onto the card base using foam tape.

Following on from this I die-cut a frame, ink blending it through the Altenew Simple Shapes Cover Die stencil die-cut using the Altenew Woodland Escape Pink Sand Fresh Dye Ink and adhered it onto the card front using foam tape. It just created a beautiful texture around the edge of the frame.

I then used the Bokeh Technique with the stencil die-cut and the Altenew Blue Mountains Indigo Skies and Altenew Woodland Escape Pink Sand Fresh Dye Ink. I die-cut the ink blended background with the Altenew Happy Holidays Script Die Set and adhered it onto the card front.

Following on from this I stamped the Altenew Delicate Garden Flower Stamp, coloured it using the Altenew Delicate Garden Stencil with the Altenew Woodland Escape and Frosted Foliage Fresh Dye Inks.
Tip: Remember ink blending is all about layering and to achieve perfect blending is patience. Altenew's Crips Dye Inks are versatile you can watercolour, ink blend and use them in many techniques.

I then die-cut it with the Altenew Delicate Garden Flower Die and adhered it onto the card front using 3D foam dots.

To finish I stamped the Altenew Delicate Garden Sentiment Stamp onto cardstock, heat emboss it and adhered it onto the card front using 3D foam dots. I added some sequins.
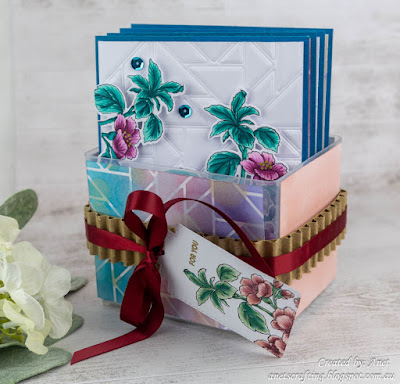
Feminine Gift Package
This is where I incorporated my recycle elements. I used an ear bud plastic container and cardboard from a box that my furry children's pet supplies were shipped in.


First I created my own stencil by die-cutting the Altenew Simple Shapes Cover Die and trimmed white cardstock to 3" x 3 7/8".
Following on from this I used the Ombre Technique with the stencil die-cut and the Altenew Woodland Escape Redwood Fresh Dye Ink, Sweet Dreams Teal Cave Crisp Dye Ink and Altenew Blue Mountains Indigo Skies Fresh Dye Ink.

I then die-cut a piece of white cardstock with a few circle dies. I used the Bokeh Technique with the stencil die-cut and the Altenew Woodland Escape Pink Sand and Altenew Blue Mountains Water Hyacinth Fresh Dye Ink. I adhered it onto the container using foam tape.
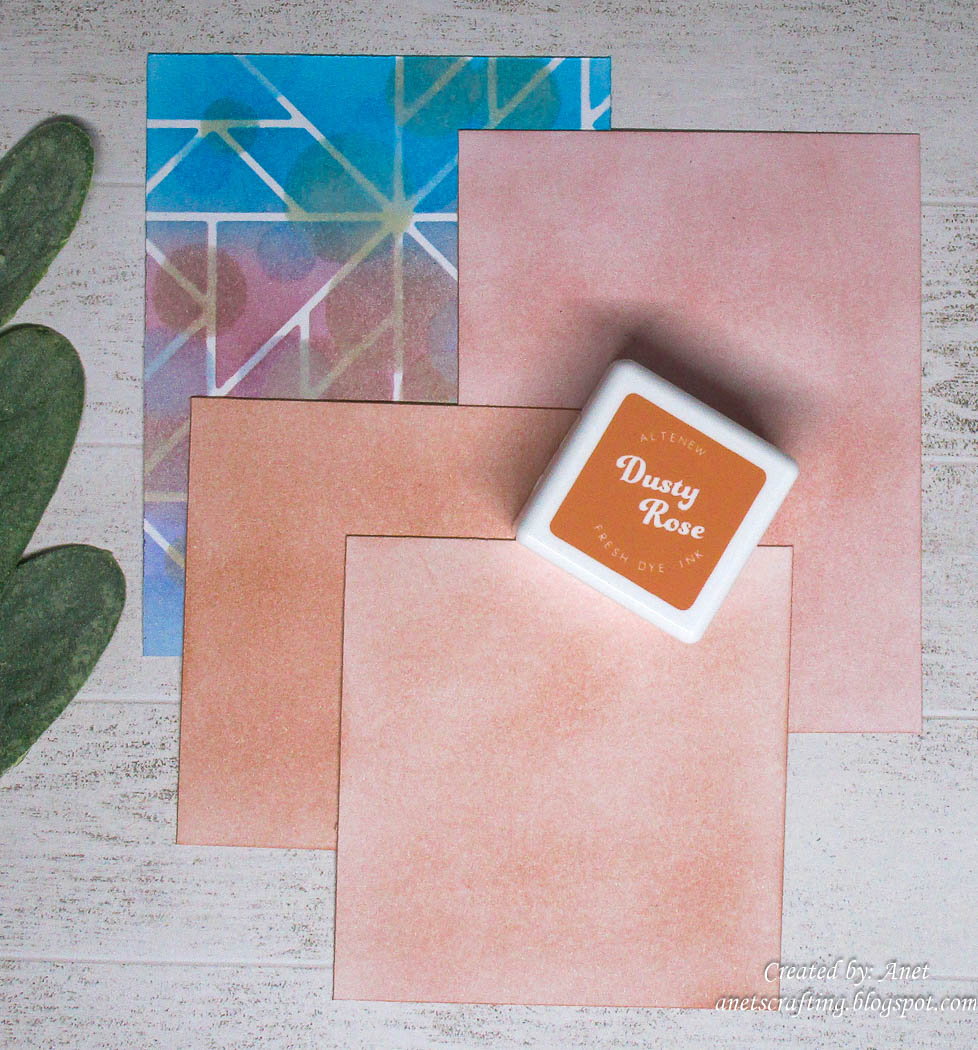
Following on from this I trimmed white cardstock once to 3" x 3 7/8" and twice to 2 7/8" x 3". I ink blending it with the Altenew Woodland Escape Dusty Rose Fresh Dye Ink and adhered it onto the container using double sided tape.

I then trimmed a strip of the cardboard to 1" and added it around the plastic container using double sided tape.

Following on from this I die-cut white cardstock with a Tag Die. I then stamped the Altenew Delicate Garden Flower Stamp and water coloured it with the Altenew Woodland Escape and Frosted Foliage Fresh Dye Ink.

I then stamped a sentiment, heat emboss it, punched a hole and adhered it onto the cardboard sleeve using ribbon.
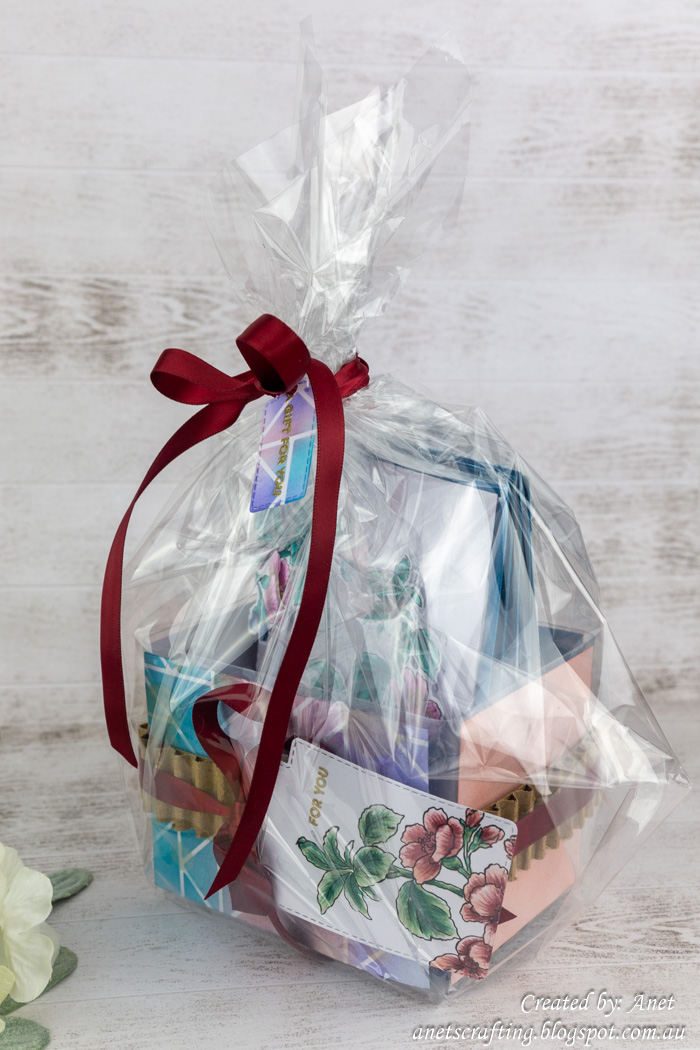
To finish I die-cut white cardstock with a Tag Die. I used the Bokeh Technique with the Altenew Simple Shapes Cover Die stencil die-cut and the Altenew Blue Mountains Indigo Skies, Woodland Escape Redwood Fresh Dye Ink and Sweet Dreams Teal Cave Crisp Dye Ink. I punched a hole, wrap the container with Cellophane, tied it with ribbon and the tag attached.
Video Tutorial
Be sure to check out my Video Tutorial below to learn how to create the Masculine and Feminine Gift Packages.
Also do not forget to check out my Masculine Gift Card Set.
I will share more of my projects from the AECP as I work my way through the courses so stay tuned for more cardmaking posts!
My Personal blog here:
My YouTube here:
My Facebook here:
https://www.facebook.com/AnetVanZyl/
Thank you for visiting me and I hope you enjoyed how I created my Feminine Gift Card Set. This was such a fun and learning experience! I always appreciate you taking the time to leave a lovely comment.
Anet x
I would like to enter the following challenges:
Classic Design Challenge Blog. Theme: Anything Goes.
Morgan's ArtWorld Challenge Blog. Theme: Anything Goes.
The Four Seasons Challenge Blog. Theme: Spring.
Passion For Markers Challenge Blog. Theme: Add a Sentiment.
Mix It Up Challenge Blog. Theme: Anything Goes - Optional Embossing.
Worldwide Crafters and Colorists Challenge Blog. Theme: Anything Goes.
Aud Sentiments Challenge Blog. Theme: Watercoloring & Sentiment.
Dream Valley Challenge Blog. Theme: Make It Sparkle.
613 Avenue Create Challenge Blog. Theme: Anything Goes - Optional Say It With Flowers.
Make My Monday Challenge Blog. Theme: Clean and Simple Base + 1 Layer
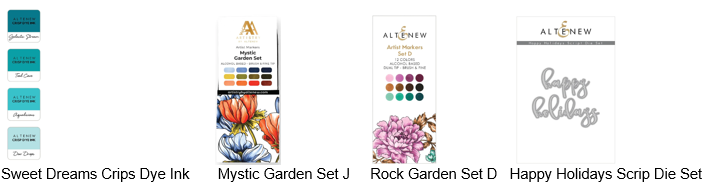
Just in case you want to do a little shopping I have added the links below (they are affiliate links which means that I will receive a small portion of the sale at no extra cost to you). I truly appreciate your support of my card adventures!
Material list:


Bravo, Anet!! Your card sets look amazing. Way to go! Brilliant job!
ReplyDeleteEach one is absolutely beautiful and so nicely presented in the gift box! Thank you so much for sharing with us at Four Seasons challenge!
ReplyDeleteOo, I like this set, too - what pretty flowers! Thanks so much for playing at Make My Monday!
ReplyDeleteWow, you have created a set of stunning creation along w/ steps by steps of your work! Someone will be truly lucky to get these cards. You are so talented. Thank you for joining us at MMM challenge
ReplyDeleteStunning feminine cards! Thanks for sharing at PFM
ReplyDeleteNatx
Wow, another beautiful set! Your stencilling is so effective and looks great behind your stamped images! So much work gone into writing your blog post too with all those tips and techniques you've shared - just brilliant! Thanks for sharing at Passion for Markers. Hugs, Karen x
ReplyDeleteOh Anet these are all just fabulous! What beautiful gift sets! Thanks so much for joining in the fun at our Four Seasons Challenge! Good Luck and we hope you’ll come back again soon.
ReplyDeleteDarlene
Co-Owner
FOUR SEASONS CHALLENGE
DAR’S CRAFTY CREATIONS
FYI ... don't forget about our embossing challenge as well as our stenciling challenge blogs ... here's the links for your convience:
Embossing ... Can You Handle the Pressure
Stenciling ... STENCIL FUN CHALLENGE
Beautiful project Anet. Thank you for sharing with us over at Morgan's ArtWorld. We hope to see you again.
ReplyDelete~ Wendy CT
Me again. A beautiful project Anet. Thank you for sharing with us over at Worldwide Crafters and Colorists Challenge.
ReplyDeleteWendy DT
Beautiful cards! Thanks so much for playing at MMMChallenge blog.
ReplyDeleteHugs
beautiful map
ReplyDeletethanks for joining our challenge
greetings jolanda bongers
dt morgans art world
wow such an amazing gift - beautiful and clever. Thank you for sharing with us over at 613 and we hope to see you in future challenges Elaine DT x
ReplyDeleteAnother wonderful gift set of cards Anet. I love the image you've used and your colouring is perfect. I like how each card is different despite using the same image. Thanks for sharing with us at Passion for Markers this week. Hugs, Denise x
ReplyDeleteBeautiful cards Anet. Thank you for sharing with us over at Morgan's ArtWorld. Love to see you join in each month.
ReplyDelete~ Gail CT
A very pretty set. Thank you for sharing with us at Aud Sentiments.
ReplyDeleteMary
Beautiful project Anet. Thank you for sharing with us over at Worldwide Crafters and Colorists Challenge.
ReplyDeleteWendy DT