Hi Everyone,
Anet here today and welcome to my inspiration post.
Anet here today and welcome to my inspiration post.
Step by step instructions:
1. Cut white cardstock to 7 1/2" x 11" and
score at 3 1/2", 3 3/4", 7 1/4" and 7 1/2".
and My Secret Love Pattern Paper four times to 3" x 7".
Stick onto each other and adhere onto card base.
Stick onto each other and adhere onto inside of card base.
Tip: do not add double sided tape on the top to
keep it open to slide a note into the pocket.
4. Add notebook and Couture Creations Calendar
using double sided tape.
5. Die-cut My Secret Love Pattern Paper
Add ribbon and insert into pockets.


6. Die-cut My Secret Love Pattern Paper
Heat emboss, add ribbon and adhere onto card front.
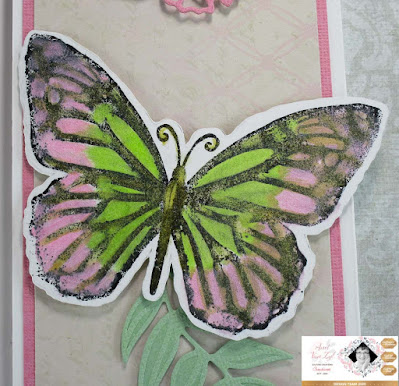
7. Stamp Lest We Forget Open Poppy Stamp,
Steampunk Dreams Butterfly Stamp onto cardstock.
Colour with Card Deco Essentials Pigment Ink,
fussy-cut and adhere onto card front using 3D foam dots.
Adhere onto card front using 3D foam dots to finish.
Here is the link to the video on how to use
the Card Deco Essentials Pigment Ink to:
- Colour Stamp Images and
- Heat Emboss Stamp Sentiment.
Video Link
Couture Creations products I have used:
C0726520 GoPower & Emboss Machine
C0727163 GoPower & Emboss Magnetic Platform
C0726342 Scoring Board 12 x 12
C0727593 My Secret Love Double Sided Pattern Paper 05
C0726520 GoPower & Emboss Machine
C0727163 GoPower & Emboss Magnetic Platform
C0726342 Scoring Board 12 x 12
C0727593 My Secret Love Double Sided Pattern Paper 05
C0727608 My Secret Love Secret Butterflies Die
C0727622 My Secret Love Create Your Sunshine Sentiment Stamp
C0727630 My Secret Love Reaching Fern Cut and Create Die
C0727691 Lest We Forget Open Poppy Stamp
C0727694 Lest We Forget Poppy Border Stamp
C0727712 Steampunk Dreams Distressed Tags Die Set
C0727714 Steampunk Dreams Butterflies Stamp Set
ULT200077 12 x 12 Ultimate Crafts Precious Cardstock
ULT200077 12 x 12 Ultimate Crafts Precious Cardstock
CDEIPL017 Card Deco Essentials Apple Green Pigment Ink
CDEIPL001 Card Deco Essentials Flour Pink Pigment Ink
CDEIPL026 Card Deco Essentials Gold Pigment Ink
C072748 Couture Creations Calendar Tabs
AD90017 Couture Creations Double Sided Tape 12mm
For Stockists click the link below:
World Wide Open Design Team Challenge Blog. Theme: Anything Goes.
The Creative Crafters Challenge Blog. Theme: Anything Goes.
Lil Patch Of Crafty Friends Challenge Blog. Theme: Anything Goes.
Tuesday Throwdown Challenge Blog. Theme: Anything Goes.
Cute Card Thursday Challenge Blog. Theme: Flowers.
Alphabet Challenge Blog. Theme: F for Flora or Fauna.
Creative Fingers Challenge Blog. Theme: Anything Goes.
Thank you for visiting today and I hope you enjoyed
how I created my pocket calendar.
Happy Crafting!
Anet
how I created my pocket calendar.
Happy Crafting!
Anet


