Wednesday 31 May 2023

Fa-La-La-La-La - The Paper Shelter

Hi Everyone, are you ready ...

It is time for a new challenge at Paper Shelter
and the theme is Music and/or Dance

Now here is my card 
Coloured with Copic Sketch Markers.


Sentiment: LOTV Christmas Sentiment Tags. Dies: Couture Creations The Gift Of Giving Holly Frame Set and Highland Christmas Christmas Forest. Sizzix Seasonal Flowers Framelits Die Set. MFT Musical Notes.

Our Sponsor The Paper Shelter are offering one lucky winner a fabulous gift certificate of $30. But, you must use a Paper Shelter product on your card or project. This could be a Paper Shelter Image, Paper or Printable. If you don't use a Paper Shelter product, you could still win 3 digi images of your own choice. So it really is a win win situation don't you think.


Make sure you go over to The Paper Shelter Shop and take a look at all the beautiful digital stamps.


I would like to enter the following challenges:

The 12 Months Of Christmas Link Up Challenge Blog. Theme:  Anything Goes.
Love To Craft Challenge Blog.  Theme:  Anything Goes.
The Creative Crafters Challenge Blog.  Theme:  Anything Goes.
Allsorts Challenge Blog.  Theme:  Anything Goes.
Dream Valley Challenge Blog.  Theme:  Anything Goes.
Peace on Earth Challenge Blog.  Theme:  Anything Goes.

Thank you for visiting me, I always appreciate you taking the time to leave a lovely comment.


Anet x

Friday 26 May 2023

Delightful Day Card - Creative Watercolor Media - AECP Level 2

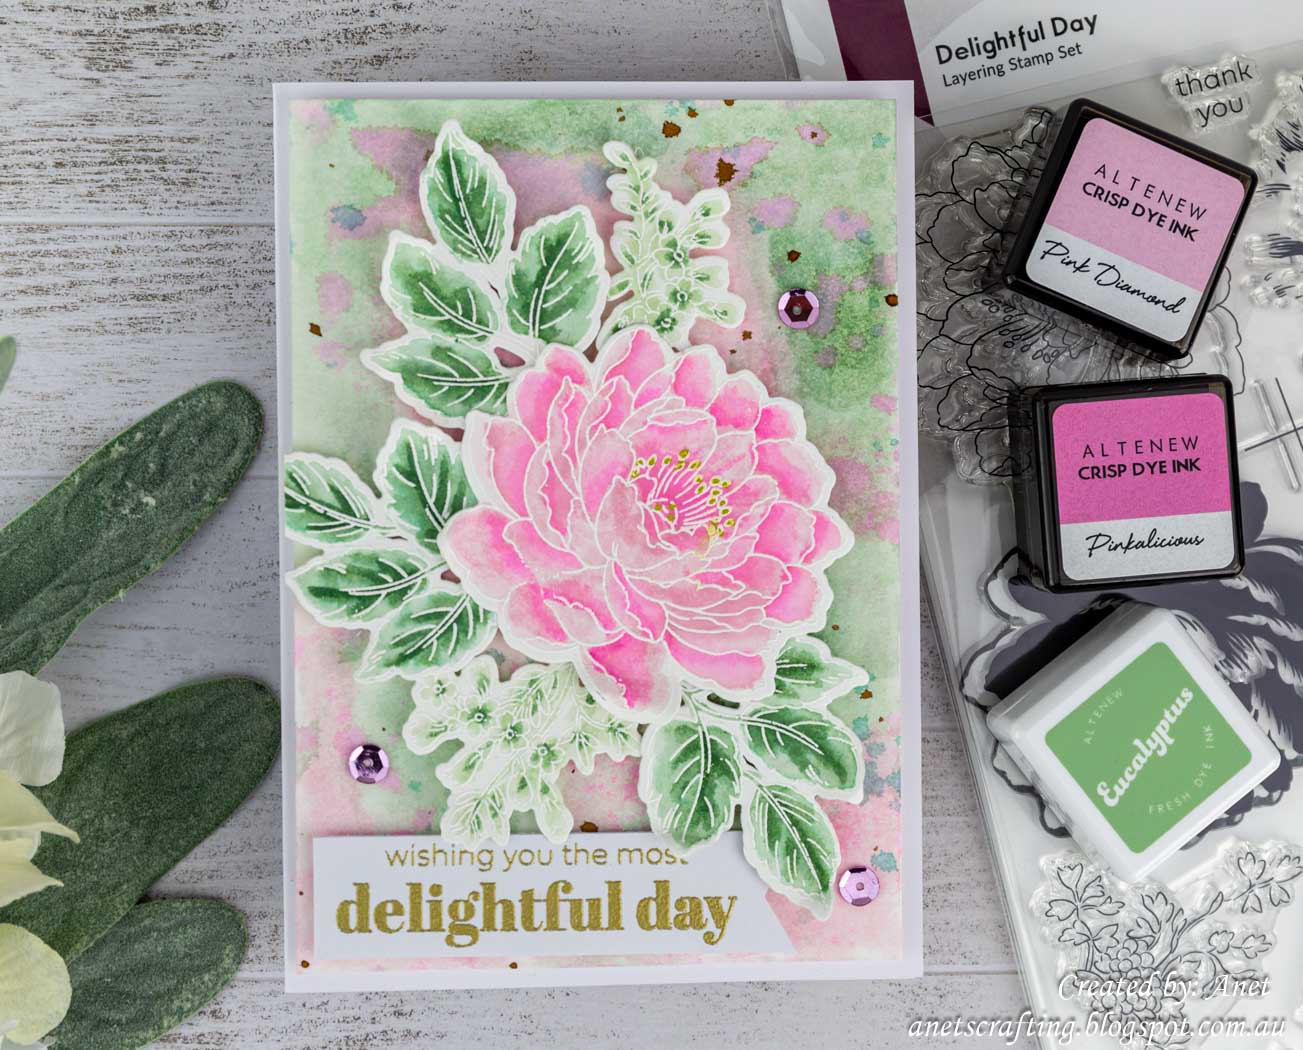
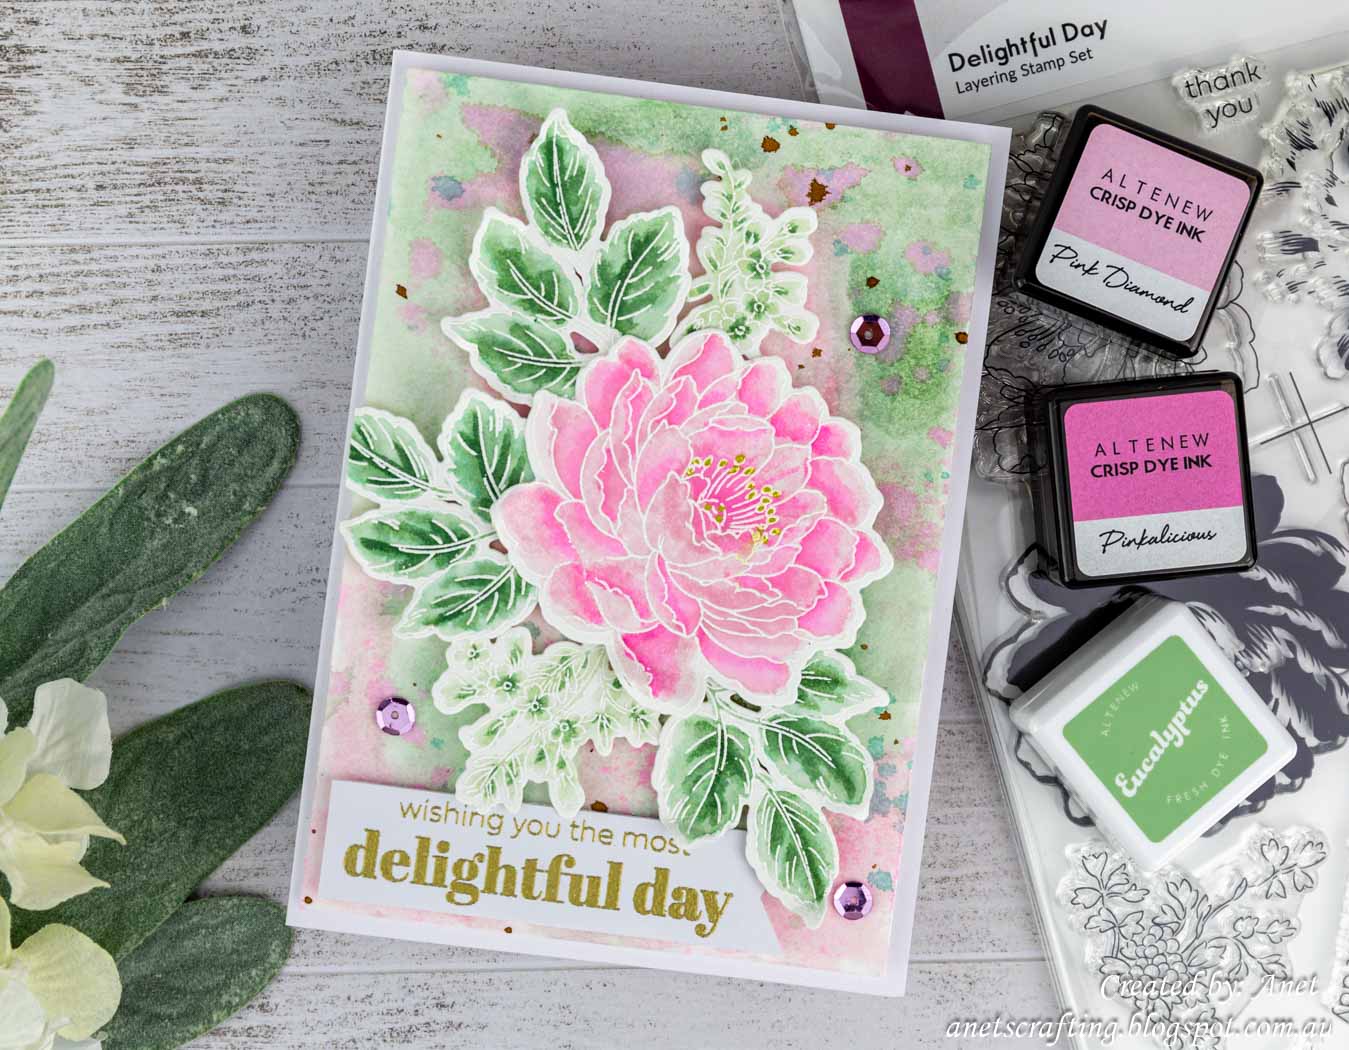
Hi Everyone, today I am sharing with you my fourth completed AECP Level 2 – Creative Watercolor Media Card. 

The course demonstrated how to take inks and turn them into fun watercolour mediums. For today's card I used a few techniques to get more use out of my ink pads.


First I created my own watercolour background using the Ink Smooshing Technique with the Altenew Cherry Blossom Crisp Dye Ink and Frosted Foliage Fresh Dye Ink. I added some gold splatters.

Following on from this I added it onto the card base using foam tape.


I then used the Embossing Resist Technique, stamped the Altenew Delightful Day Stamps and heat embossed it with the Altenew Pure White Crisp Embossing Powder.

Following on from this I then watercoloured the embossed images with the Altenew Cherry Blossom Crisp Dye Ink and Frosted Foliage Fresh Dye Ink.  I die-cut it with the Altenew Delightful Day Dies and adhered it onto the card front using 3D foam dots.


To finish I stamped the Altenew Delightful Day Sentiment Stamp, die-cut it with a fishtail die and adhered it onto the card front using 3D foam dots. I added some sequins.

I will share more of my projects from the AECP as I work my way through the courses so stay tuned for more cardmaking posts! 

If you like what you have seen from me, please give a follow over or subscribe to my Blog and Youtube if you have not already:

My Personal blog here: 

My YouTube here: 

My Facebook here: 
https://www.facebook.com/AnetVanZyl/

Thank you for visiting me and I hope you enjoyed how I created my Watercolour Card. I always appreciate you taking the time to leave a lovely comment.

Anet x


I would like to enter the following challenges: 

Double D Challenge Blog.  Theme:  Flowers.
Simon Says Stamp Challenge Blog.  Theme:  Add A Sentiment.
Word Art Wednesday Challenge Blog. Theme:  Anything Goes.
Use Your Stuff Challenge Blog.  Theme:  Use a Technique (Ink Smooshing and Emboss Resist Techniques).
Allsorts Challenge Blog.  Theme:  Absolutely Anything Goes.
Creative Fingers Challenge Blog.  Theme:  Anything Goes.
CAS on Sunday Challenge Blog.  Theme:  Embossing.

Just in case you want to do a little shopping I have added the links below (they are affiliate links which means that I will receive a small portion of the sale at no extra cost to you). I truly appreciate your support of my card adventures!


Material list:

Affiliate links are used


ALT                ALT           ALT                  ALT 


Wednesday 24 May 2023

Storyteller Card - With A Twist - AECP Level 2

Hi Everyone, today I am sharing with you my third completed AECP Level 2 – With A Twist Card. 

The course demonstrated how to take a favourite technique and get more out of your current craft products. For today's card I used a few techniques to get more use out of my stamps and inks.


First I changed or "twist" using the Altenew Tree of Fantasy Stamp. I stamped the outline of the Altenew Tree of Fantasy Stamp and heat embossed it. I then stamped one layer of the Altenew Tree of Fantasy Stamp using the Altenew Blue Mountains Crystal Violet Fresh Dye Ink and used blue cardstock instead of white cardstock.

Tip: Practice stamping on a piece of scrapped coloured cardstock to decide if the ink is the correct one when it dries.


Following on from this I stamped the Altenew Seas The Day Girl Stamp, heat embossed it and coloured it with the Altenew Blue Mountains Crystal Violet Fresh Dye Ink

I then die-cut the Altenew Seas The Day Girl Die and used it as a mask to stamp the Altenew Seas The Day Cloud Stamp. This was another twist using the cloud stamp to represent a rock on which the girl stands. I heat embossed it and coloured it with the Altenew Blue Mountains Crystal Violet Fresh Dye Ink. I adhered the blue focal image cardstock onto the card base using foam tape.


To finish I stamped Altenew Seas The Day Sentiment Stamp, heat embossed it and adhered it onto the card front using 3D foam dots. I added some sequins.

I will share more of my projects from the AECP as I work my way through the courses so stay tuned for more cardmaking posts! 

If you like what you have seen from me, please give a follow over or subscribe to my Blog and Youtube if you have not already:

My Personal blog here: 

My YouTube here: 

My Facebook here: 
https://www.facebook.com/AnetVanZyl/

Thank you for visiting me and I hope you enjoyed how I created my Twist Technique Card. I always appreciate you taking the time to leave a lovely comment.

Anet x


I would like to enter the following challenges: 

Allsorts Challenge Blog.  Theme:  Absolutely Anything Goes.
Love To Scrap Challenge Blog.  Theme:  Anything Goes.
Mix It Up Challenge Blog.  Theme:  Anything Goes - Optional Embossing.
The Creative Crafters Challenge Blog.  Theme:  Anything Goes.
Use Your Stuff Challenge Blog.  Theme:  Use a Technique (Masking Technique).
Simon Says Stamp Challenge Blog.  Theme:  Add A Sentiment.
Word Art Wednesday Challenge Blog. Theme:  Anything Goes.

Just in case you want to do a little shopping I have added the links below (they are affiliate links which means that I will receive a small portion of the sale at no extra cost to you). I truly appreciate your support of my card adventures!


Material list:

Affiliate links are used


ALT                       ALT                     ALT 


Monday 22 May 2023

So Thoughtful Card - In The Mood for Color - AECP Level 2

Hi Everyone, today I am sharing with you my second completed AECP Level 2 – In The Mood For Color Card. 

The course demonstrated how you can take your mood and apply it to your cards. For today's card I got my colour inspiration from the Altenew's Inspiration Challenge. I love how the challenges always challenge me to use colours that I normally will not use.


First I used the Mirror Stamping Technique with the Altenew Paint-A-Flower African Daisy Stampcoloured it with the Altenew Artist Markers Mystic Garden Set J and Artist Markers Rock Garden Set D.  


Following on from this I stamped the Altenew Snowing Stamp randomly onto the card front using black ink and the Altenew Frosted Foliage Jade Fresh Dye Ink

I then heat embossed the Altenew Paint-A-Flower African Daisy Sentiment Stamp and layered it onto green cardstock.


To finish I added it onto the card base using foam tape and added some sequins.

I will share more of my projects from the AECP as I work my way through the courses so stay tuned for more cardmaking posts! 

If you like what you have seen from me, please give a follow over or subscribe to my Blog and Youtube if you have not already:

My Personal blog here: 

My YouTube here: 

My Facebook here: 
https://www.facebook.com/AnetVanZyl/

Thank you for visiting me and I hope you enjoyed how I created my In The Mood For Colour Technique Card. I always appreciate you taking the time to leave a lovely comment.

Anet x


I would like to enter the following challenges: 

Allsorts Challenge Blog.  Theme:  Absolutely Anything Goes.
613 Avenue Create Challenge Blog.  Theme: Anything Goes - Twist Say It With Flowers.
Love To Scrap Challenge Blog.  Theme:  Anything Goes.
Passion For Markers Challenge Blog.  Theme:  Add a Sentiment.


Just in case you want to do a little shopping I have added the links below (they are affiliate links which means that I will receive a small portion of the sale at no extra cost to you). I truly appreciate your support of my card adventures!


Material list:

Affiliate links are used


ALT          ALT      ALT            ALT          ALT 


Saturday 20 May 2023

Happy Birthday Card - Beyond Basic Backgrounds - AECP Level 2

Hi Everyone, today I am sharing with you my first completed AECP Level 2 – Beyond Basic Backgrounds Card. 

The course demonstrated how to add stunning backgrounds and take your card to the next level. For today's card I used a few techniques to get more use out of my dies.


First I create my own stencil by die-cutting white cardstock with the Altenew Seas The Day Cloud Dies to create my own background.

Following on from this I ink blend through the negative die-cut spaces using the Ombre Technique with the Altenew Blue Mountains Alpine Fresh Dye InkI stamped the Altenew Seas The Day Cloud Stamps onto the blended clouds and heat embossed it using Altenew Pure White Crisp Embossing Powder


I then used the Inlaid Diecutting Technique and die-cut the blended background with the Altenew Seas The Day Seagulls Dies

Following on from this I stamped the Altenew Seas The Day Seagulls Stamps onto blending cardstock, coloured it with Altenew Artist Markers Summer Afternoon Set and die-cut it with the Altenew Seas The Day Seagulls Dies.


I then adhered the blending background onto the card base using foam tape. I added the die-cut seagulls into the negative die-cut spaces using 3D foam dots to get some dimension.

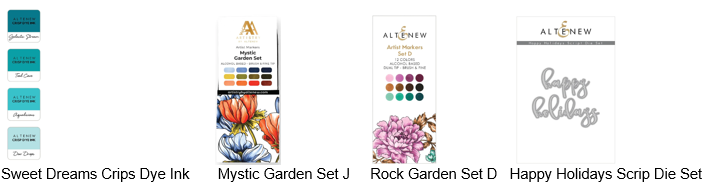
To finish I die-cut the Altenew Happy Holidays Script Die Set once with white and once with navy cardstock. I adhered it onto each other creating a shadow effect. I stamped a birthday sentiment and heat emboss it using Altenew Pure White Crisp Embossing Powder. I adhered it onto the card front using 3D foam dots.

I will share more of my projects from the AECP as I work my way through the courses so stay tuned for more cardmaking posts! 

If you like what you have seen from me, please give a follow over or subscribe to my Blog and Youtube if you have not already:

My Personal blog here: 

My YouTube here: 

My Facebook here: 
https://www.facebook.com/AnetVanZyl/

Thank you for visiting me and I hope you enjoyed how I created my Beyond Basic Background Technique Card. I always appreciate you taking the time to leave a lovely comment.

Anet x


I would like to enter the following challenges: 

Love To Craft Challenge Blog.  Theme:  Anything Goes.
Mix It Up Challenge Blog.  Theme:  Anything Goes - Optional Embossing.
The Creative Crafters Challenge Blog.  Theme:  Anything Goes.
Craft Rocket Challenge Blog.  Theme:  For The Boys.
Sweet Stampin Challenge Blog.  Theme:  Masculine.
Make My Monday Challenge Blog.  Theme:  Clean and Simple Base + 1 Layer
Use Your Stuff Challenge Blog.  Theme:  Use a Technique (Inlaid Diecutting and Ombre Technique).

Just in case you want to do a little shopping I have added the links below (they are affiliate links which means that I will receive a small portion of the sale at no extra cost to you). I truly appreciate your support of my card adventures!


Material list:

Affiliate links are used

ALT                ALT                   ALT                 ALT 


Wednesday 17 May 2023

In the 20s - The Paper Shelter

Hi Everyone, are you ready ...

It is time for a new challenge at Paper Shelter
and the theme is Embellish It!

Now here is my card 
using In The 20s
Coloured with Copic Sketch Markers.


Sentiment: LOTV Sentiment Tag. Dies: MFT Butterflies. Marianne Design Flower Set. Couture Creations My Secret Love Flourished Corners, Peaceful Peonies Tall Branches and Lavender Love Weathered Fences.

Our Sponsor The Paper Shelter are offering one lucky winner a fabulous gift certificate of $30. But, you must use a Paper Shelter product on your card or project. This could be a Paper Shelter Image, Paper or Printable. If you don't use a Paper Shelter product, you could still win 3 digi images of your own choice. So it really is a win win situation don't you think.


Make sure you go over to The Paper Shelter Shop and take a look at all the beautiful digital stamps.


I would like to enter the following challenges:

Crafts Galore Encore Challenge Blog.  Theme:  Anything Goes.
Classic Design Challenge Blog.  Theme:  Anything Goes.
Love To Craft Challenge Blog.  Theme:  Anything Goes.
Love To Scrap Challenge Blog.  Theme:  Anything Goes.
The Corrosive Challenge Blog.  Theme:  Anything Goes.
Dream Valley Challenge Blog.  Theme:  Make It Sparkle.
The Creative Crafters Challenge Blog.  Theme:  Anything Goes.

Thank you for visiting me, I always appreciate you taking the time to leave a lovely comment.


Anet x

AECP Level 1 Final Challenge - Feminine Gift Card Set Part 2

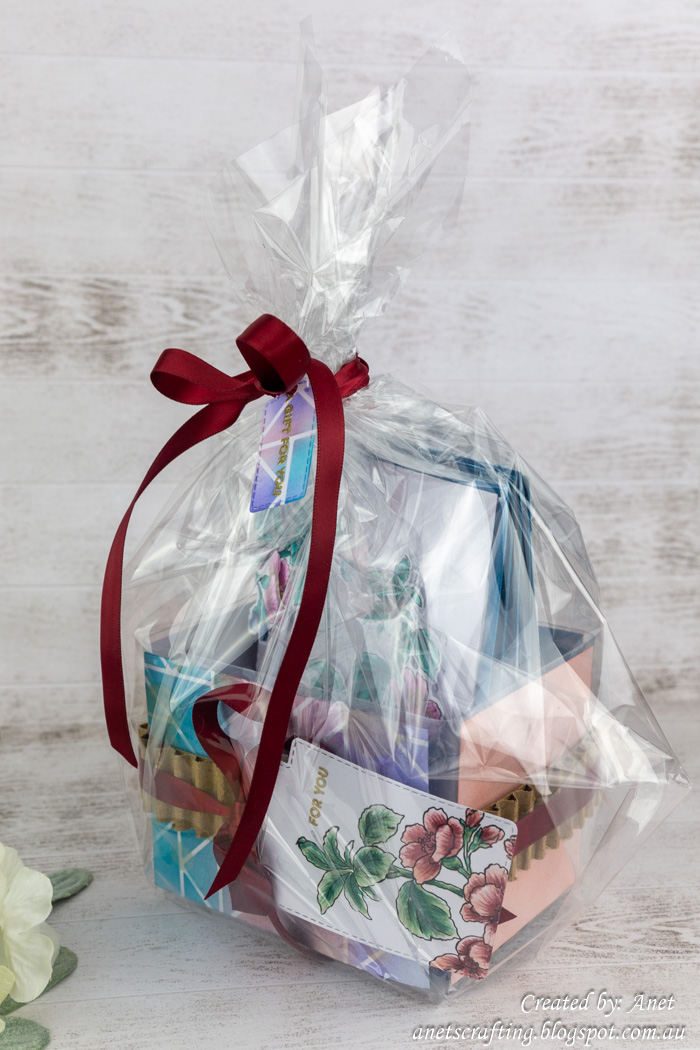
Hi Everyone, I am so excited to share my completed final challenge Feminine Gift Card Set for the AECP Level 1. It really stretched my knowledge and creativity, but I am enjoying the creative AECP journey and learning along the way.

I have been challenged to create one set of Masculine Cards and one set of Feminine Cards using at least three techniques I learned from the AECP Level 1 Courses. 

Herewith my 4 Feminine Cards:


I am also asked to design how I package the masculine and feminine sets as a gift and also use a recycled item. I decided to use the recycled items on the packaging for each card set and I will explain how I did this in the latter part of my post and video.


The AECP Level 1 Techniques I used: 

1. Easy Die Cutting Techniques
From this class I learned to connect other techniques to what I already knew about die cutting and take it to another level to achieve texture.

2. Celebration Stencil Techniques
This class was so helpful by learning how to use the Altenew Simple Shapes Cover Die with different stencil techniques to create backgrounds. 

3. Easy Ink Blending Techniques
The class provided a framework how to achieve great ink blending results for my project backgrounds.

To achieve a cohesive theme I used all the above techniques in various ways to create 4 Feminine Cards, concentrating on the following colour inspiration and using the Altenew Delicate Garden Sentiment Stamp & Die Set and Simple Shapes Cover Die through out the set.


Card 1 - Happy Birthday


First I embossed white cardstock with the Altenew Simple Shapes Cover Die. I just love the beautiful textured background I achieved with the cover die.

Tip: Just remember to use an embossing mat and the special sandwich for your die-cut machine in order to get the perfect embossing with the cover die.


Following on from this I stamped the Altenew Delicate Garden Flower Stamp onto blending cardstock and colour it with the Altenew Artist Markers Mystic Garden Set J and Artist Markers Rock Garden Set D. I die-cut it with the Altenew Delicate Garden Flower Die and adhered it onto the card front using 3D foam dots.


To finish I stamped the Altenew Delicate Garden Sentiment Stamp, heat emboss it and layered it onto the card base using foam tape. I added some sequins.

Card 2 - Hello


First I ink blending the background with the Altenew Woodland Escape Fresh Dye Inks and added splatters with the Altenew Woodland Escape Redwood Fresh Dye Ink. adhered it onto the card base using foam tape.


Following on from this I die-cut white cardstock with the Altenew Simple Shapes Cover Die and adhered it onto the ink blended background.


I then stamped the Altenew Delicate Garden Flower Stamp onto the vellum, heat emboss it and coloured the flower image with the Altenew Woodland Escape RedwoodBlue Mountains Indigo Skies and Frosted Foliage Forest Fern Fresh Dye Ink. I die-cut it with the Altenew Delicate Garden Flower Die and adhered it onto the card front using 3D foam dots.

Tip: Always use a powder tool to prepare your paper before heat embossing. The powder will prevent embossing powder from sticking to areas where you do not want it.


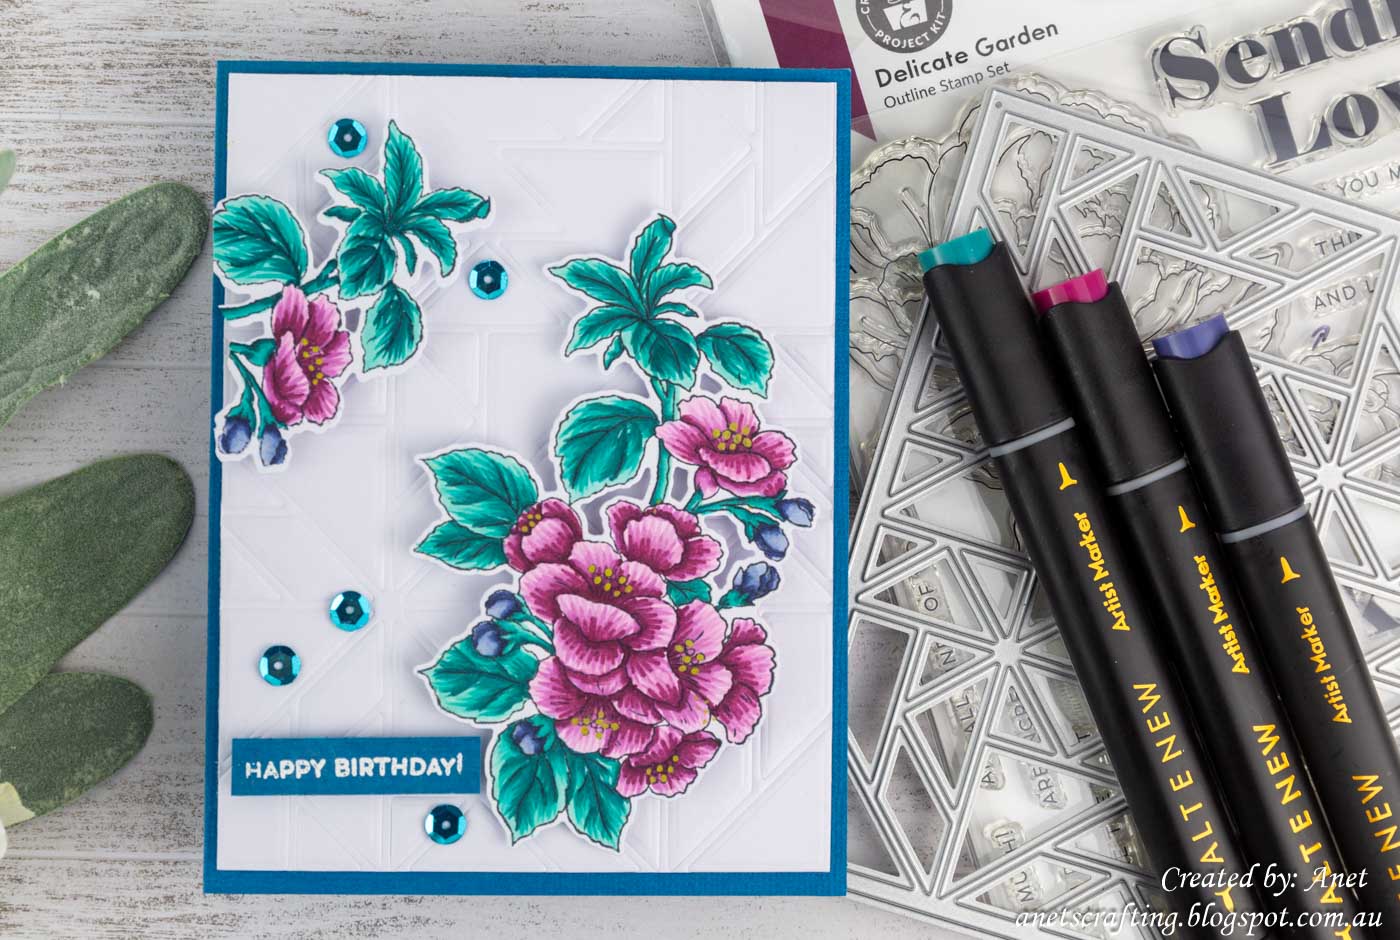
To finish I stamped the Altenew Delicate Garden Sentiment Stamp onto cardstock and heat emboss it. I adhered it onto the card front using 3D foam dots and added some sequins.

Card 3 - Thank You


First I mixed Altenew Blue Mountain Alphine Aster Fresh Dye Ink with Embossing Paste and used it through the Altenew Simple Shapes Cover Die stencil die-cut. Just love the beautiful texture I achieved for the background.

Tip: Just remember to clean your stencils and tools right away after you used Embossing Paste. Do not allow it to dry, because it will be very difficult to clean.


Following on from this I added splatters onto the textured background using the Altenew Blue Mountain Indigo Skies Fresh Dye Ink.


I then stamped the Altenew Delicate Garden Flower Stamp onto blending cardstock and colour it with the Altenew Artist Markers Mystic Garden Set J and Artist Markers Rock Garden Set D. I die-cut it with the Altenew Delicate Garden Flower Die and adhered it onto the card front using 3D foam dots.

Tip: When colouring with Alcohol Ink Markers it is important to use blending cardstock to prevent bleeding.


To finish I stamped the Altenew Delicate Garden Sentiment Stamp, heat emboss it and layered it onto the card base using foam tape. I added some sequins.

Card 4 - Happy


First I ink blending the background with the Altenew Woodland Escape Pink Sand Fresh Dye Ink and added splatters with the Altenew Blue Mountain Indigo Skies Fresh Dye Ink. layered it onto the card base using foam tape.


Following on from this I die-cut a frame, ink blending it through the Altenew Simple Shapes Cover Die stencil die-cut using the Altenew Woodland Escape Pink Sand Fresh Dye Ink and adhered it onto the card front using foam tape. It just created a beautiful texture around the edge of the frame.


I then used the Bokeh Technique with the stencil die-cut and the Altenew Blue Mountains Indigo Skies and Altenew Woodland Escape Pink Sand Fresh Dye Ink. I die-cut the ink blended background with the Altenew Happy Holidays Script Die Set and adhered it onto the card front.


Following on from this I stamped the Altenew Delicate Garden Flower Stamp, coloured it using the Altenew Delicate Garden Stencil with the Altenew Woodland Escape and Frosted Foliage Fresh Dye Inks

Tip: Remember ink blending is all about layering and to achieve perfect blending is patience. Altenew's Crips Dye Inks are versatile you can watercolour, ink blend and use them in many techniques.


I then die-cut it with the Altenew Delicate Garden Flower Die and adhered it onto the card front using 3D foam dots.


To finish I stamped the Altenew Delicate Garden Sentiment Stamp onto cardstock, heat emboss it and adhered it onto the card front using 3D foam dots. I added some sequins.

Feminine Gift Package

This is where I incorporated my recycle elements. I used an ear bud plastic container and cardboard from a box that my furry children's pet supplies were shipped in.


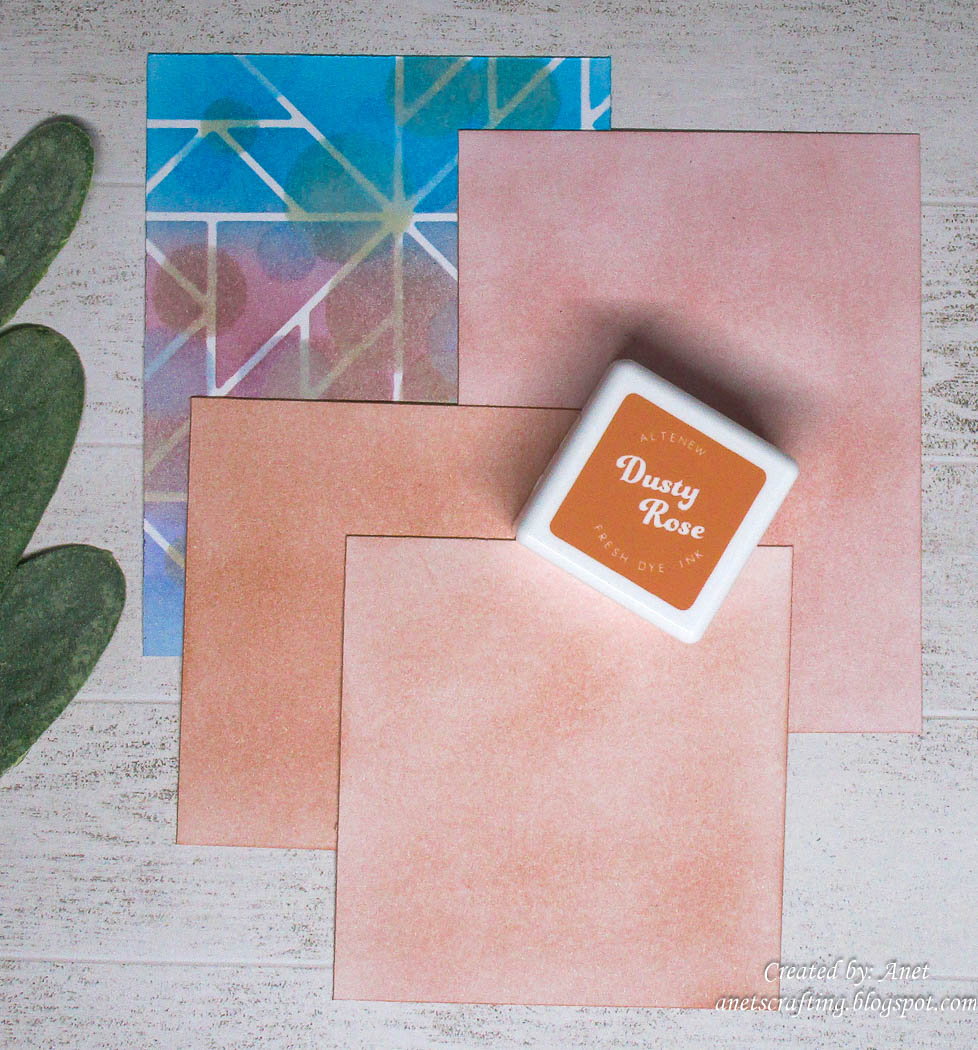
First I created my own stencil by die-cutting the Altenew Simple Shapes Cover Die and trimmed white cardstock to 3" x 3 7/8".

Following on from this I used the Ombre Technique with the stencil die-cut and the Altenew Woodland Escape Redwood Fresh Dye Ink, Sweet Dreams Teal Cave Crisp Dye Ink and Altenew Blue Mountains Indigo Skies Fresh Dye Ink.


I then die-cut a piece of white cardstock with a few circle dies. I used the Bokeh Technique with the stencil die-cut and the Altenew Woodland Escape Pink Sand and Altenew Blue Mountains Water Hyacinth Fresh Dye Ink. I adhered it onto the container using foam tape.


Following on from this I trimmed white cardstock once to 3" x 3 7/8" and twice to 2 7/8" x 3". I ink blending it with the Altenew Woodland Escape Dusty Rose Fresh Dye Ink and adhered it onto the container using double sided tape.


I then trimmed a strip of the cardboard to 1" and added it around the plastic container using double sided tape. 


Following on from this I die-cut white cardstock with a Tag Die. I then stamped the Altenew Delicate Garden Flower Stamp and water coloured it with the Altenew Woodland Escape and Frosted Foliage Fresh Dye Ink. 


I then stamped a sentiment, heat emboss it, punched a hole and adhered it onto the cardboard sleeve using ribbon.


To finish I die-cut white cardstock with a Tag Die. I used the Bokeh Technique with the Altenew Simple Shapes Cover Die stencil die-cut and the Altenew Blue Mountains Indigo Skies, Woodland Escape Redwood Fresh Dye Ink and Sweet Dreams Teal Cave Crisp Dye InkI punched a hole, wrap the container with Cellophane, tied it with ribbon and the tag attached.

Video Tutorial

Be sure to check out my Video Tutorial below to learn how to create the Masculine and Feminine Gift Packages.


Also do not forget to check out my Masculine Gift Card Set

I will share more of my projects from the AECP as I work my way through the courses so stay tuned for more cardmaking posts! 

If you like what you have seen from me, please give a follow over or subscribe to my Blog and Youtube if you have not already:

My Personal blog here: 

My YouTube here: 

My Facebook here: 
https://www.facebook.com/AnetVanZyl/

Thank you for visiting me and I hope you enjoyed how I created my Feminine Gift Card Set. This was such a fun and learning experience! I always appreciate you taking the time to leave a lovely comment.

Anet x


I would like to enter the following challenges: 

Classic Design Challenge Blog.  Theme:  Anything Goes.
Morgan's ArtWorld Challenge Blog.  Theme:  Anything Goes.
Passion For Markers Challenge Blog.  Theme:  Add a Sentiment.
Mix It Up Challenge Blog.  Theme:  Anything Goes - Optional Embossing.
Aud Sentiments Challenge Blog.  Theme:  Watercoloring & Sentiment.
Dream Valley Challenge Blog.  Theme:  Make It Sparkle.
613 Avenue Create Challenge Blog.  Theme:  Anything Goes - Optional Say It With Flowers.
Make My Monday Challenge Blog.  Theme:  Clean and Simple Base + 1 Layer

Just in case you want to do a little shopping I have added the links below (they are affiliate links which means that I will receive a small portion of the sale at no extra cost to you). I truly appreciate your support of my card adventures!


Material list:

Affiliate links are used


ALT                              ALT                   ALT 


ALT                              ALT                   ALT 


ALT                      ALT              ALT          ALT 


Related Posts Plugin for WordPress, Blogger...