Hi Everyone,
Anet here today and welcome to my inspiration post.
Anet here today and welcome to my inspiration post.
I made two different cards
using the stamping with plastic wrap technique
with the new releases Lest We Forget and
Steampunk Dreams Collection
using the stamping with plastic wrap technique
with the new releases Lest We Forget and
Steampunk Dreams Collection
from Couture Creations.
Step by step instructions:
Card 1 - Happy Birthday
1. Trim white cardstock to 15cm x 22cm, score and fold card base.
2. Trim Battle Fatigue Cardstock to 10.2cm x 14.5cm
and adhere onto card front.

3. Trim white cardstock to 9.2cm x 13.5cm.
and adhere onto card front.

3. Trim white cardstock to 9.2cm x 13.5cm.
Take a piece of plastic wrap and crinkle it up into a small ball.
Dab it onto Card Deco Gold Pigment Ink Pad and
then stamp across white cardstock.
Dab it onto Card Deco Gold Pigment Ink Pad and
then stamp across white cardstock.
4. Continue until you cover the entire piece of cardstock
and adhere onto card front using 3D foam dots.
and adhere onto card front using 3D foam dots.
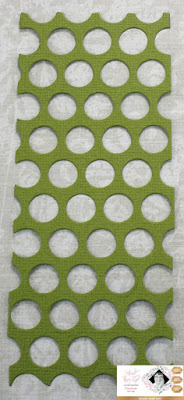
5. Die-cut Battle Fatigue Cardstock with
Steampunk Dreams Mesh Cutting Die and
adhere onto card front.
6. Die-cut white cardstock with
Delightful Sentiments Happy Cut, Foil and Emboss Die.
Dab plastic wrap onto Card Deco Gold Pigment Ink Pad
and stamp colour onto sentiment die-cuts.
Adhere onto card front using 3D foam dots.
7. Die-cut Battle Fatigue Cardstock with fishtail die,
stamp sentiment and adhere onto card front using 3D foam dots.
8. Stamp Lest We Forget Bugle Mini Stamp onto
blending cardstock, colour and fussy-cut.
Adhere onto card front using 3D foam dots.
Card 2 - Thank You
1. Trim white cardstock to 15cm x 22cm, score and fold card base.
2. Trim Garnet Cardstock to 10.2cm x 14.5cm
and adhere onto card front.

3. Trim white cardstock to 9.2cm x 13.5cm.
and adhere onto card front.

3. Trim white cardstock to 9.2cm x 13.5cm.
Using two pieces of scrap paper,
mask off about 2cm on each side of the white cardstock
so that only the centre of the white cardstock is visible.
4. Take a piece of plastic wrap and crinkle it up into a small ball.
Dab it onto Card Deco Gold Pigment Ink Pad and
then stamp the colour down the centre of the white cardstock.
Continue until you cover the entire centre section.
5. Dab it onto Red Ink Pad and then stamp the colour
down the centre of the white cardstock.
Continue until you cover the entire centre section
and then remove the mask.
Adhere onto card front using 3D foam dots.
6. Die-cut Garnet Cardstock and Battle Fatigue Cardstock
with Lest We Forget Poppy Border Die and adhere onto card front.
7. Die-cut white cardstock with sentiment die.
Dab plastic wrap onto red ink pad
and stamp colour onto sentiment die-cuts.
Stick onto card front.
8. Die-cut Garnet Cardstock and black cardstock
with Lest We Forget Layered Poppy Die.
Adhere onto card front using 3D foam dots to finish.
with Lest We Forget Poppy Border Die and adhere onto card front.
Dab plastic wrap onto red ink pad
and stamp colour onto sentiment die-cuts.
Stick onto card front.
8. Die-cut Garnet Cardstock and black cardstock
with Lest We Forget Layered Poppy Die.
Adhere onto card front using 3D foam dots to finish.
Couture Creations products I have used:

C0726520 GoPower & Emboss Machine

C0727163 GoPower & Emboss Magnetic Platform
C0727681 Lest We Forget Layered Poppy Die
C0727683 Lest We Forget Poppy Border Die
C0727698 Lest We Forget Bugle Mini Stamp
C0727711 Steampunk Dreams Mesh Die
C0727681 Lest We Forget Layered Poppy Die
C0727683 Lest We Forget Poppy Border Die
C0727698 Lest We Forget Bugle Mini Stamp
C0727711 Steampunk Dreams Mesh Die
C0726956 Delightful Sentiments Happy
Cut, Foil and Emboss Die
Cut, Foil and Emboss Die
ULT200067 12 x 12 Ultimate Crafts Garnet Cardstock
ULT200039 12 x 12 Ultimate Crafts Battle Fatigue Cardstock
AD90017 Couture Creations Double Sided Tape 12mm
CDEIPL026 Card Deco Essentials Gold Pigment Ink
AD90017 Couture Creations Double Sided Tape 12mm
CDEIPL026 Card Deco Essentials Gold Pigment Ink
For Stockists click the link below:
Simply Create Too Challenge Blog. Theme: Use Flowers.
Creative Inspiration Challenge Blog. Theme: Fabulously Feminine.
Dream Valley Challenge Blog. Theme: Favourite Colours (Green and Gold).
Lil Patch Of Crafty Friends Challenge Blog. Theme: Anything Goes.
Sweet Stampin Challenge Blog. Theme: Thank You.
Love To Craft Challenge Blog. Theme: Anything Goes.
World Wide Open Design Team Challenge Blog. Theme: Anything Goes.
Crafty Creations Challenge Blog. Theme: Anything Goes.
Love To Craft Challenge Blog. Theme: Anything Goes.
World Wide Open Design Team Challenge Blog. Theme: Anything Goes.
Crafty Creations Challenge Blog. Theme: Anything Goes.
Through The Purple Haze Challenge Blog. Theme: Anything Goes.
Creative Fingers Challenge Blog. Theme: Anything Goes.


Two fabulous cards each design is perfect Thank you so much for sharing this idea love and hugs Carole x
ReplyDeleteAbsolutely gorgeous cards Anet, both beautifully designed and coloured, especially love the poppies, Kate x x
ReplyDeleteA beautiful thank you card, the poppies are beautiful, lovely background from the plastic wrap technique.
ReplyDeleteThank you for playing along at Sweet Stampin' this week.
Chris
x
Beautiful projects! Thanks for joining our Anything Goes Challenge at Lil Patch of Crafty Friends. I hope join us again real soon!
ReplyDeleteHugs, Joy
Joyfully Stamps
Lil Patch of Crafty Friends, Owner/Coordinator
Both cards are beautiful. Love the technique. I will have to try it. Thank you for sharing with us over here at World Wide Open Design Team Challenge and best of luck with your entry.
ReplyDeleteGale DT for http://worldwideopendesignteamchallenge.blogspot.com.au/
Wow cool work here. Nice job. They look great.
ReplyDeleteThank you for sharing with us over here at World Wide Open Design Team Challenge and best of luck with your entry.
Annette DT / Admin / Registered Owner for https://worldwideopendesignteamchallenge.blogspot.com/
Hi Anet, a super pair of cards to show off the newest collection, would be great for sending to serving military personnel and to retired Diggers too. Thank you for joining us at Lil Patch of Crafty Friends, good luck in the prize draw.. Megan DT LPoCF
ReplyDeleteLovely creations! Thank you for sharing with us over at World Wide Open Design Team Challenge and best of luck with your entry.
ReplyDelete~ Sherry DT/Admin xx
Very beautiful pair of cards! Thanks for joining us at Creative Fingers Challenge.
ReplyDeleteGreat technique and fun flower cards. Thanks for joining in on the fun at Simply Create Too, challenge 160, Use Flowers
ReplyDeleteErica (Simply Create Too DT Member)
Great card. Love the poppies. Thanks for joining the challenge at Love to Craft Challenge Blog.
ReplyDelete