Showing posts with label Altenew Educator Certification Program. Show all posts

Thursday, 19 September 2024

AECP Level 3 Final Workshop - Cover Die-cut Stencil Techniques

Hi Everyone, I am so excited to share with you my journey of the Altenew Educator Certification Program and cards that I made for my AECP Level 3 Final Workshop.

I chose the Altenew Educator Certification Program to build on my card knowledge.  It was the best investment I could make for myself, because the knowledge that I received took my card making skills to another level.  The classes were well planned and informative.  In total I completed 25 courses for Level 1, 2 and 3, which also involved completing 25 cards and blog posts along the way.

The Altenew Academy Level Courses provided me the opportunity to meet other like minded crafters.  Walter and I started our AECP Journey together in the same Group and he became a good friend.  He was like my crafting compass.  When I first loaded my card, Walter was well ahead and I decided he would be my motivation to keep going and finish my classes.  We started it together and ended it together by attending each other's workshops.

Planning the Workshop

After I completed all 5 courses for Level 3, Erum emailed me the Final Challenge of Level 3 (Educator).

From all the knowledge I accumulated from the program, I had to decide on the following for approval, a topic, 2 hour step by step instruction lesson plan, create a banner to advertise the Workshop, confirm and schedule a time and date to host the Workshop.

After a lot of planning and brainstorming on paper.  (To be quite honest it was not just one, but several papers.)  When I finally decided on the topic all the other things just started falling in place.  I created the two cards, wrote up the step by step instructions and prep work to be completed before the workshop.  

I sent it through to Erum for approval and was so happy when I heard back that it has been approved.  She thanked me for coordinating all the documents and then I confirmed and scheduled a time and date with Erum.

Focus of the Workshop

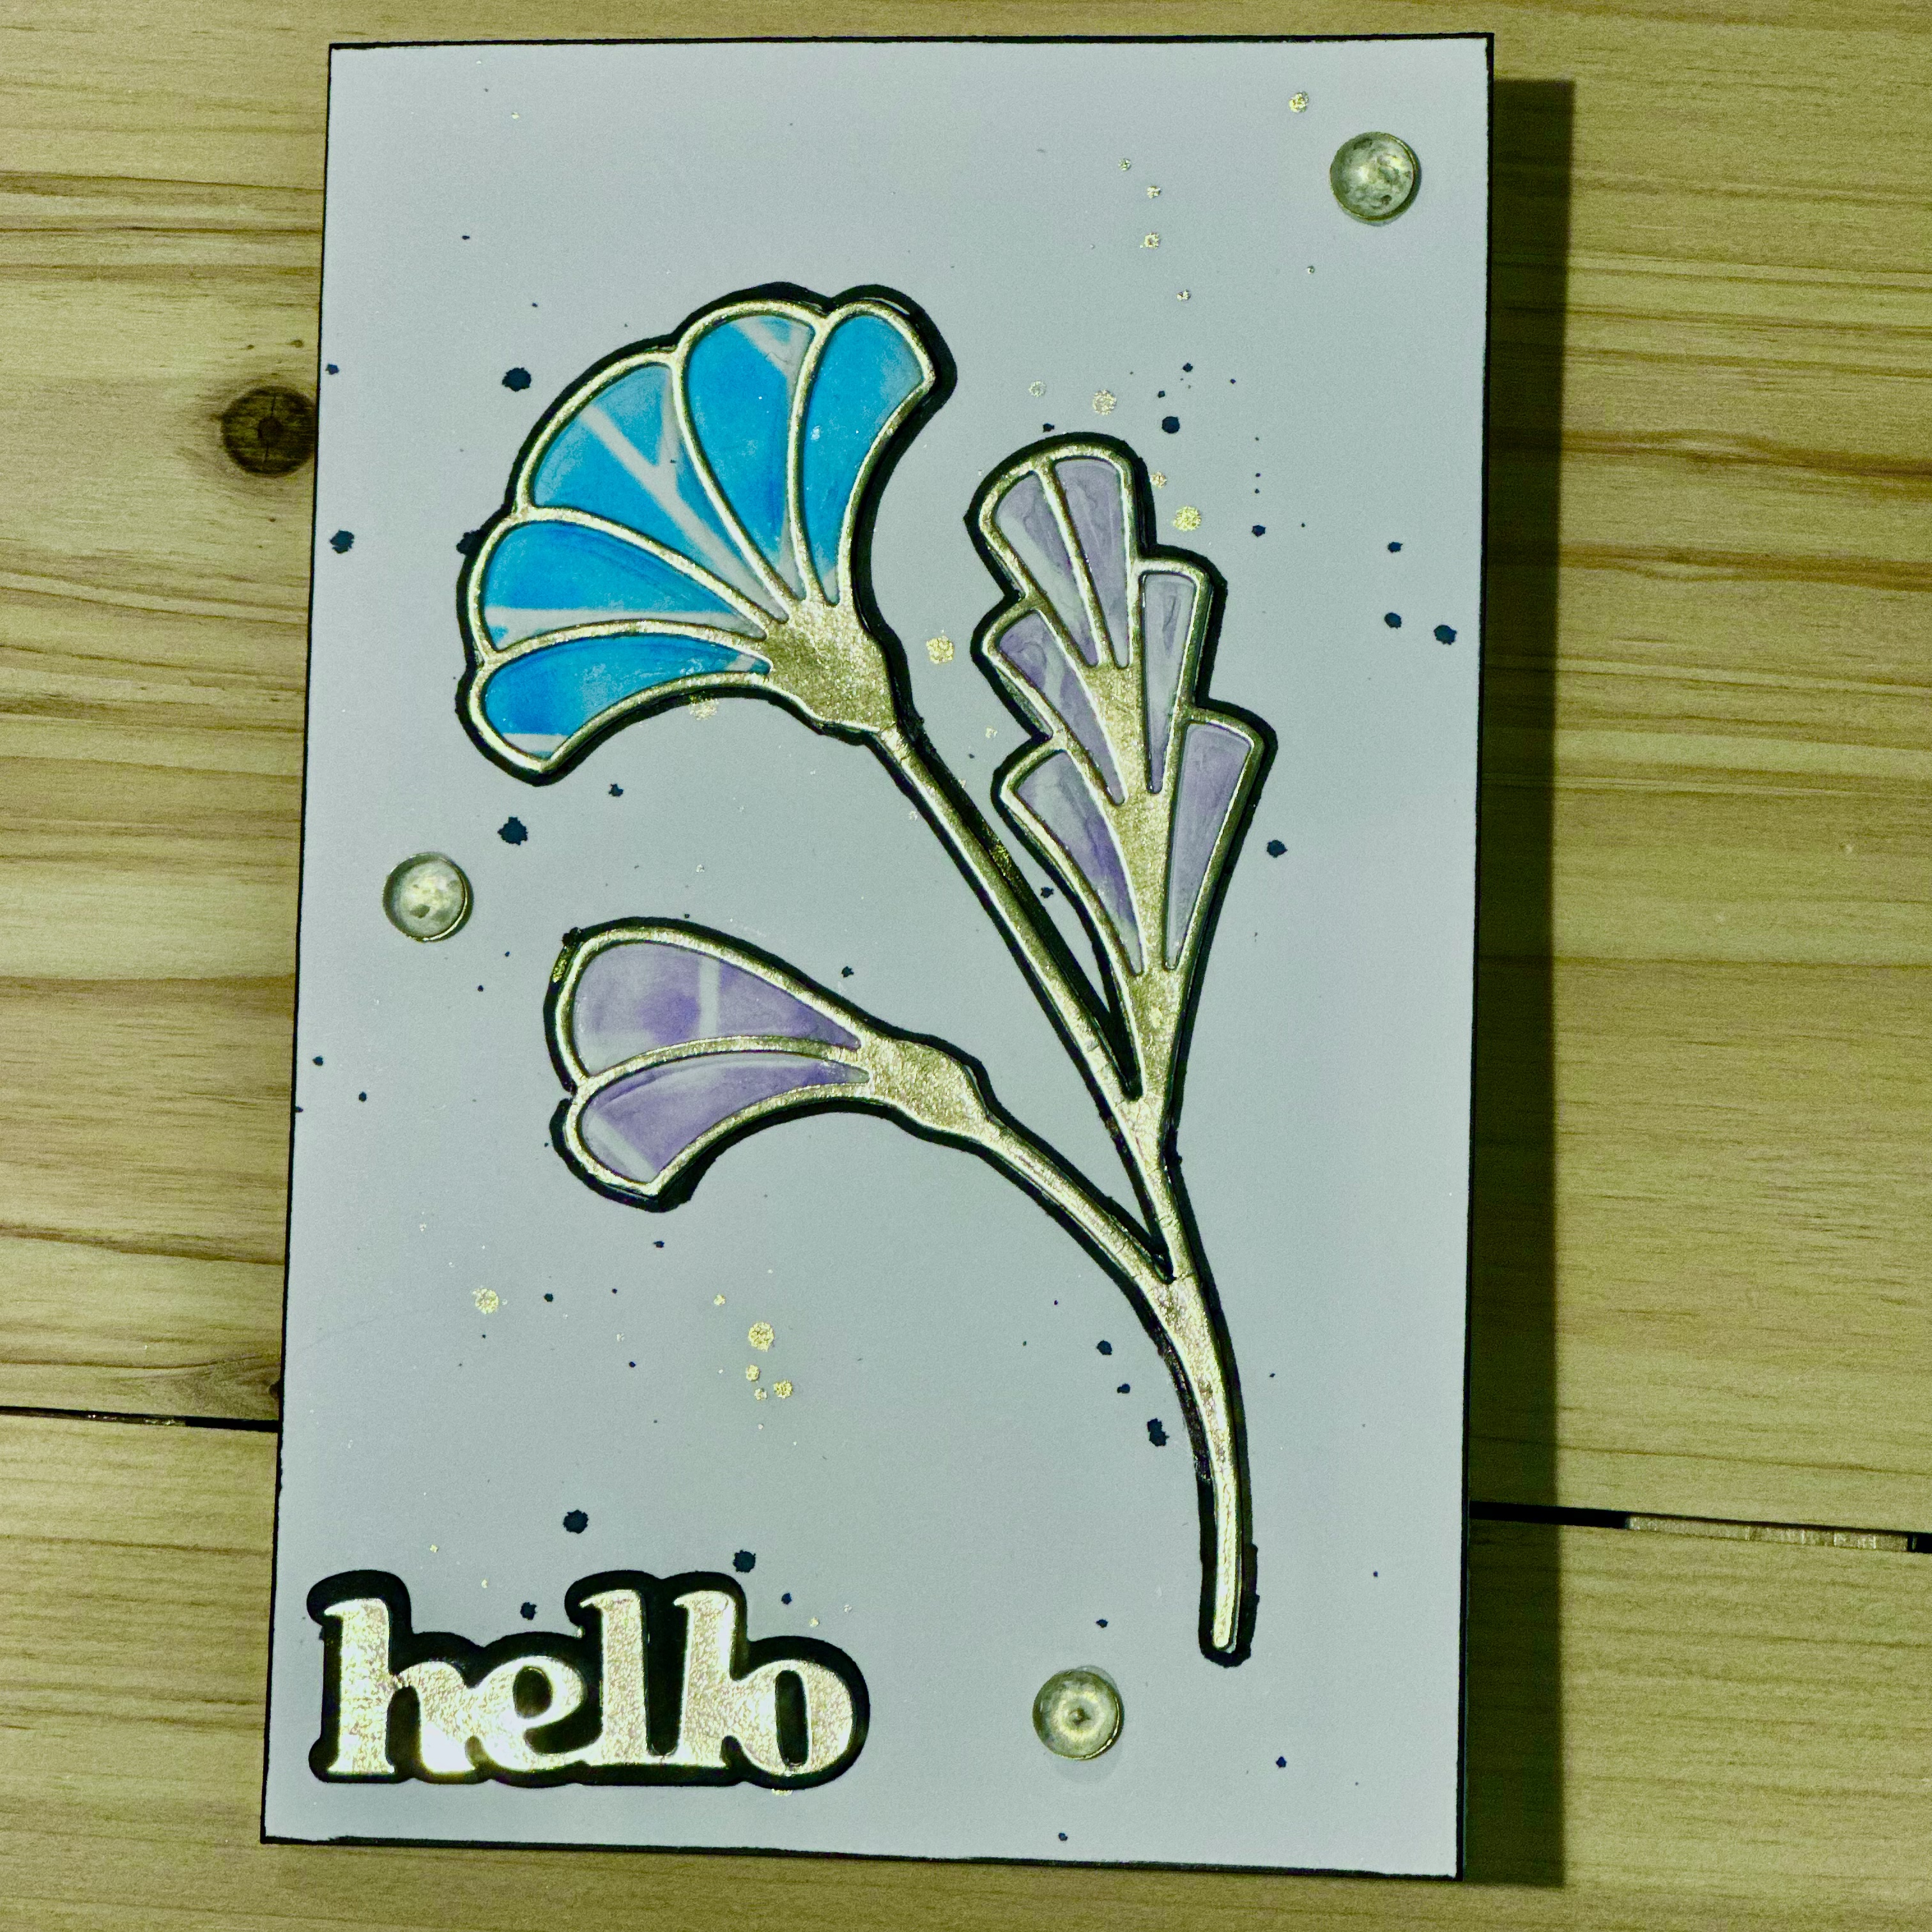
The focus of my Workshop was on the Altenew Simple Shapes Cover Die and using the die-cut as a DIY Stencil. I wanted to teach the participants that, by using the same DIY Stencil together with different stencil techniques, one can create a feminine and masculine card.  I also like to use my craft supplies in more than one way.

Card 1


I concentrated on using the DIY Stencil together with the Double Overlay Stencil Technique.  The focal point would be the beautiful ink blend background and I added a gold cardstock Altenew Rose Queen die-cut.  This just created a beautiful and elegant feminine card.


Card 2


I then concentrated on the Stencil Stacking Technique with the DIY Stencil.  The focal point would be the beautiful ink blend background with added embossing paste texture.  I used the Emboss Resist Technique with the Altenew Seas The Day Boat and Seagulls stamped images.  The end result was a fabulous masculine card with a textured background.  


Bonus Cards

As a bonus I added two cards in the Step by Step Instructions with links to the posts on how to use the Altenew Simple Shapes Cover Die, in two more ways.


Workshop Banner

To get participants to sign up for the Workshop, I created a banner and advertised it on the Altenew Groups and on my Facebook.  A minimum of 4 participants had to attend up to a maximum of 10.  I was so happy that 10 people signed up, but unfortunately 2 people could not make it on the day.  Still I had 8 participants that attended my Workshop.  


Zoom

I received the best advice from my friend Walter, to subscribe to Zoom for a month.  This meant I could host my workshop with out interruptions during the workshop.  I emailed the Zoom link to Erum and the participants a day before the Workshop. 

Workshop - Saturday, 14th September 2024

Then the big day arrived, my 2 hour Workshop took place on Saturday, 14th September 2024.  It was my first Zoom Workshop.  I have done a physical workshop before.  I had my step by step instructions to follow during the Workshop and emailed it to all the participants an hour before the workshop.  My participants have done all their prep work beforehand and had all the supplies they needed ready.  During the workshop the participants gave me feedback on the prep work instructions.  They appreciated the well prepared prep work instructions and felt that the reminders about the class kept them updated.    

I set-up 2 hours before the Workshop so there would not be any hiccups or surprises with technology.  I felt confident and prepared for the Workshop.  Erum and I had the opportunity to discuss things before the workshop and I started to relax.  By the time we finished all the nerves went away.  The participants then started joining Zoom and I accepted them in.

I have received such wonderful feedback during and after the workshop from the participants.  They felt that the workshop was fun, engaging and ran at a good pace.  The inspiration and techniques sparked more ideas and they will use it time and again.  After receiving this feedback I knew I achieved what I wanted with my Workshop.

There was enough time at the end to answer questions and to engage with all the participants. The workshop ended with happiness and a feeling of great achievement.

Participant Gallery

I want to thank Walter, Suna, Miranda, Ishani, Sarah, Liz, Irene and Aarthi for attending my workshop.  I could not have done it without you and do appreciate all of you.  And to Erum, thank you for your patience, kindness and support you have shown me.

Here are all the amazing and beautiful cards the participants created in the Workshop:


Sarah enjoyed the card technique so much that she created another beautiful card.


Aarthi made another feminine card with the techniques used in Card 2.

Conclude

I had the opportunity to guest design once for Altenew and am now ready and looking forward to any new chapter it might bring forth.  Watch this space, because in future there just might be more workshops in the pipeline :).  

Happy crafting and most of all find joy in crafting.
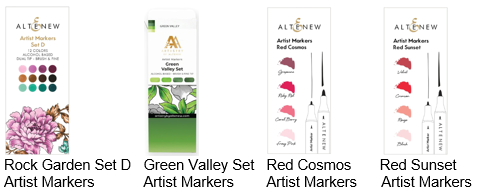
Supply list:

Affiliate links are used

Just in case you want to do a little shopping I have added the links below (they are affiliate links which means that I will receive a small portion of the sale at no extra cost to you). I truly appreciate your support of my card adventures!


Alt                         Alt                           Alt                       Alt


Alt                         Alt                           Alt 


Alt                                            Alt                                   Alt 


Alt                         Alt                           Alt                       Alt


Alt                         Alt                      Alt                       Alt

Other:
  • Die-cut Machine
  • All-in-One Magnetic Platform
  • Heat Tool
  • Palette Knife
  • Blending Brush
  • Liquid Glue
  • Sequins
  • Scissors
  • 3D Foam Dots

Cardstock:
  • Neenah Solar White Cardstock
  • Gold Cardstock
  • Black Cardstock
  • Navy Cardstock

If you like what you have seen from me, please give a follow over or subscribe to my Blog and Youtube if you have not already:

My Personal blog here: 

My YouTube here: 

My Facebook here: 
https://www.facebook.com/AnetVanZyl/

Thank you for visiting me and until next time, happy crafting. I always appreciate you taking the time to leave a lovely comment.

Anet x


Thursday, 7 December 2023

Slimline Card & Memory Keeping Orange Blossom - Reimagining Slim Line Cards Into Memory Keeping - AECP Level 3

Hi Everyone, today I am sharing with you my fifth and final completed Level 3 Classes card for the Altenew Academy Level 3 Classes - Reimagining Slim Line Cards into Memory Keeping. The course demonstrated how to create a stunning Slimline Card as a starting point for your Memory Keeping. 

After I completed Nathalie and Maryam's course I was so inspired to improve on and stretch myself in creating a Memory Keeping Layout using a Slimline Card as an example for motivation. I was so amazed by using the Altenew Dies, Inks and Stamps and thinking out of the box, you can create two beautiful projects which compliments each other. I think that is a win don't you?

For today's Slimline Card and Memory Keeping I used the beautiful Altenew Orange Blossom Die Set and Altenew Dotted Waves Cover Die with a few Card Techniques. 


Slimline Card

First I die-cut and embossed white cardstock with the Altenew Dotted Waves Cover Die and ink blend it using the Sweet Dreams Crisp Dye InkI love the pretty textured background I created for the Altenew Orange Blossom die-cuts.


Following on from this I die-cut white cardstock with the Altenew Orange Blossom Die Set and ink blend it with the Altenew Summer Afternoon Crisp Dye InkFrosted Foliage Fresh Dye Ink and Coffee Break Espresso Crisp Dye InkI adhered it onto the card panel using 3D Foam Dots.


I then added splatters using the Altenew Metallic Watercolor 14 Pan Set and Altenew Watercolor Fine Brush. I adhered it onto the card front using the Altenew Instant Dimension Foam Tape.


To finish I die-cut white and green mirror cardstock with the Altenew Envelope Liner Hello Die to create a shadow effect sentiment. I adhered it onto the card front using 3D foam dots and added some sequins.

Memory Keeping

I just had to use a photo of our adorable and cute furry child. She gives us so much love and joy and the Altenew Orange Blossom die-cuts just makes a beautiful frame around the picture.

First I die-cut and embossed white cardstock with the Altenew Dotted Waves Cover Die and ink blend it with the Sweet Dreams Crisp Dye InkI layered it onto cardstock and then onto white cardstock using the Altenew Instant Dimension Foam Tape.

Following on from this I die-cut cardstock with a circle die, layered the photo onto the cardstock and adhered it onto the ink embossed panel using the Altenew Instant Dimension Foam Tape.


I then die-cut white cardstock with the Altenew Orange Blossom Die Set and ink blend it with the Altenew Summer Afternoon Crisp Dye InkFrosted Foliage Fresh Dye Ink and Coffee Break Espresso Crisp Dye InkI adhered it onto the ink embossed panel using 3D Foam Dots.


Following on from this I added splatters using the Altenew Metallic Watercolor 14 Pan Set and Altenew Watercolor Fine Brush

I then die-cut white and green mirror cardstock using a sentiment die to create a shadow effect sentiment and adhered it on the ink embossed panel.


Following on from this I die-cut green mirror cardstock with the Altenew Modern Deer Heart Die, adhered it onto the ink embossed panel using 3D foam dots and added some sequins.

To finish I trimmed coloured and white cardstock and layered the ink embossed panel onto the cardstock using the Altenew Instant Dimension Foam Tape.

I will share more of my projects from the AECP as I work my way through the courses so stay tuned for more cardmaking posts! 

If you like what you have seen from me, please give a follow over or subscribe to my Blog and Youtube if you have not already:

My Personal blog here: 

My YouTube here: 

My Facebook here: 
https://www.facebook.com/AnetVanZyl/

Thank you for visiting me and I hope you enjoyed how I created my Slimline Card and Memory Keeping. I always appreciate you taking the time to leave a lovely comment.

Anet x


I would like to enter the following challenges: 

Dream Valley Challenge Blog.  Theme:  Anything Goes.
Crafts Galore Challenge Blog.  Theme:  Anything Goes.
Critter Crazy Challenge Blog.  Theme:  Anything Goes.
Morgan's Artworld Challenge Blog.  Theme:  Anything Goes.
Birthstone Challenge Blog.  Theme:  Turquoise.
Classic Design Challenge blog.  Theme:  Anything Goes.
The Creative Crafters Challenge Blog.  Theme:  Anything Goes.

Just in case you want to do a little shopping I have added the links below (they are affiliate links which means that I will receive a small portion of the sale at no extra cost to you). I truly appreciate your support of my card adventures!

Material list:

Affiliate links are used

ALT                       ALT                            ALT                  ALT 

ALT                      ALT                          ALT                     ALT             


ALT                            ALT                     


Thursday, 2 November 2023

Christmas Wood Grain Card - Creative Coloring with Erum - AECP Level 3

Hi Everyone, today I am sharing with you my fourth completed card for the Altenew Academy Level 3 Classes – Creative Coloring with Erum Advanced Techniques. The course demonstrated how to use the different Altenew Colouring Mediums with an array of advanced techniques and make extra special cards.

After I completed Erum's course I felt enriched with allot of practical knowledge and advanced techniques and could not wait to start creating. If you want to make your cards extra special than this is the perfect class. 

For today's card I used the Altenew Happy Pomegranates Stamp & Die Set with a few Colouring Techniques.


First I trimmed red cardstock and adhered it onto the card front using the Altenew Instant Dimension Foam Tape.

Following on from this I created a wood texture background using the Wet to Dry Watercolour Technique with the Altenew Watercolor 36 Pan SetAltenew Watercolor Paper Pad and Altenew Watercolor Brush Set 


I then added splatters using the Altenew Metallic Watercolor 14 Pan Set and Altenew Watercolor Fine Brush and adhered it onto the card front.

Following on from this I then used the Altenew Stampwheel and stamped the Altenew Happy Pomegranates Stamp onto blending cardstock. 


I then coloured the Pomegranates Stamped Image using the Altenew Artist Markers Green Valley SetRed Cosmos SetRed Sunset Set and Rock Garden Set D. I just love the Altenew Alcohol Ink Markers and it blends perfectly. The end result is a beautiful bright and striking coloured image.


To finish I die-cut gold and red cardstock with the Altenew Merry Christmas Die, adhered onto the panel and added some sequins.

I will share more of my projects from the AECP as I work my way through the courses so stay tuned for more cardmaking posts! 

If you like what you have seen from me, please give a follow over or subscribe to my Blog and Youtube if you have not already:

My Personal blog here: 

My YouTube here: 

My Facebook here: 
https://www.facebook.com/AnetVanZyl/

Thank you for visiting me and I hope you enjoyed how I created my Creative Colouring Technique Card. I always appreciate you taking the time to leave a lovely comment.

Anet x


I would like to enter the following challenges: 

Passion For Markers Challenge Blog.  Theme:  Embellish It.
The Holly and Ivy Christmas Challenge Blog.  Theme:  Anything Christmas Goes.
Beccy's Place Challenge Blog.  Theme:  Month Of Holiday Cards.
Morgan's ArtWorld Challenge Blog.  Theme:  Anything Goes.
Mix It Up Challenge Blog.  Theme:  Anything Goes Optional Stamping.
Pearly Sparkles Challenge Blog.  Theme:  Christmas/Winter.
Peace on Earth Christmas Challenge Blog.  Theme:  Anything Goes Christmas.
The 12 Months Of Christmas Linkup Challenge Blog.  Theme:  Anything Goes Christmas.
Die Cut Divas Challenge Blog.  Theme:  All About The Holidays.
Love To Scrap Challenge Blog.  Theme:  Anything Goes.

Just in case you want to do a little shopping I have added the links below (they are affiliate links which means that I will receive a small portion of the sale at no extra cost to you). I truly appreciate your support of my card adventures!

Material list:

Affiliate links are used

ALT                                ALT             ALT                 ALT                


ALT                         ALT                    ALT                    ALT             

ALT                            ALT                         ALT                ALT 


Monday, 16 October 2023

Watercolor Flower Card - Artists’ Watercolor 101 for Paper Crafters - AECP Level 3

Hi Everyone, today I am sharing with you my third completed card for the Altenew Academy Level 3 Classes – Artists' Watercolor 101 for Paper Crafters, taught by Emily Midgett. The course demonstrated how to apply different watercolour techniques, laying down layers of colour to achieve greater depth and dimension in watercolouring. 

I am very new to watercolouring and Emily provided such great guidance and tips. If you ever wonder how to start with watercolouring this is the perfect class. 

For today's card I used a few Watercoloring Techniques using the Altenew Delicate Garden Stamp & Die Set and Altenew Watercolor 36 Pan Set. I just love the beautiful soft and intense pigmented colouring I achieved.


First I created a wet-on-wet watercolor background using the Altenew Watercolor 36 Pan SetAltenew Watercolor Paper Pad and Altenew Watercolor Brush Set

Following on from this I added splatters using the Altenew Metallic Watercolor 14 Pan Set and Altenew Watercolor Fine Brush. I then adhered it onto the card front using the Altenew Instant Dimension Foam Tape.


I then stamped the Altenew Delicate Garden Stamp onto the Altenew Watercolor Paper Pad using the Altenew Stampwheel and Blackout Ink on 3.

Following on from this I water coloured the flower image using the Altenew Watercolor 36 Pan Set and Altenew Watercolor Brush Set. I used the Fresh Lemon, Bamboo, Warm Sunshine, Forest Glades and Espresso. 

I then die-cut the water coloured image with the Altenew Delicate Garden Die and adhered it onto the card front using 3D foam dots.


To finish I die-cut white and blue cardstock with the Altenew Envelope Liner Hello Die to create a shadow effect sentiment. I adhered it onto the card front using 3D foam dots and added some sequins.

I will share more of my projects from the AECP as I work my way through the courses so stay tuned for more cardmaking posts! 

If you like what you have seen from me, please give a follow over or subscribe to my Blog and Youtube if you have not already:

My Personal blog here: 

My YouTube here: 

My Facebook here: 
https://www.facebook.com/AnetVanZyl/

Thank you for visiting me and I hope you enjoyed how I created my Watercolour Flower Card. I always appreciate you taking the time to leave a lovely comment.

Anet x


I would like to enter the following challenges: 

Cards Galore Challenge Blog.  Theme:  Anything Goes.
Morgan's ArtWorld Challenge Blog.  Theme:  Anything Goes.
My Time To Craft Challenge Blog.  Theme:  In The Garden.
Allsorts Challenge Blog.  Theme:  Anything Goes.
Classic Design Challenge Blog.  Theme:  Anything Goes.
The Creative Crafters Challenge Blog.  Theme:  Anything Goes.
613 Avenue Create Challenge Blog.  Theme:  Anything Goes.
Crafters Cafe Challenge Blog.  Theme:  Flowers.

Just in case you want to do a little shopping I have added the links below (they are affiliate links which means that I will receive a small portion of the sale at no extra cost to you). I truly appreciate your support of my card adventures!

Material list:

Affiliate links are used

ALT                       ALT           ALT              ALT   
ALT                  ALT            ALT          ALT         

Related Posts Plugin for WordPress, Blogger...